CRICUT BASICS: STEP-BY-STEP GUIDE TO YOUR FIRST PROJECT
I’m not an expert with Cricut machines or Design Space, so take this information as it is.
If you’re new to Cricut, here’s a very basic tutorial to help you get started with your first project.
If you’re a seasoned user, you may still find some useful notes about the files.
For additional assistance, there are thousands of excellent tutorials on YouTube.
This tutorial uses the desktop application
STEP 1
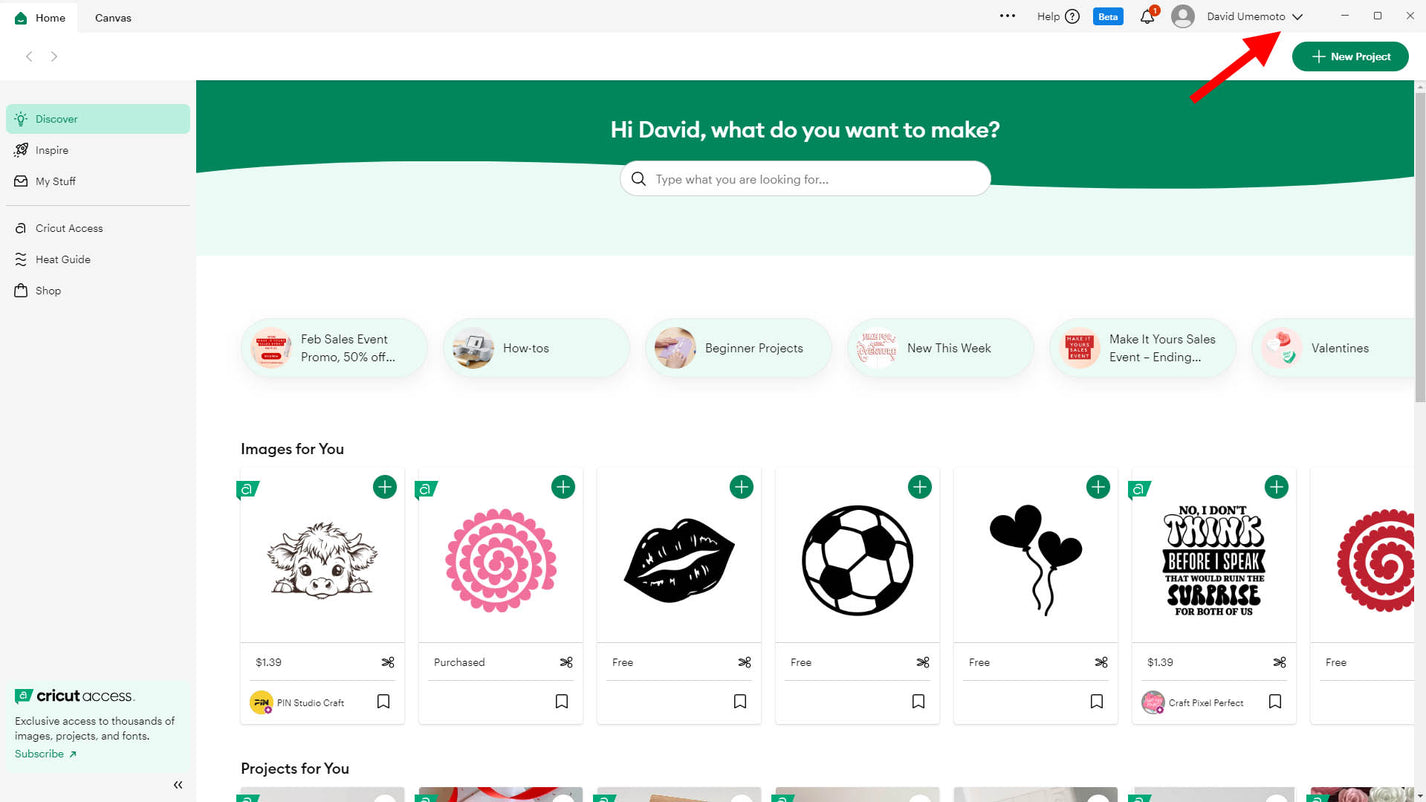
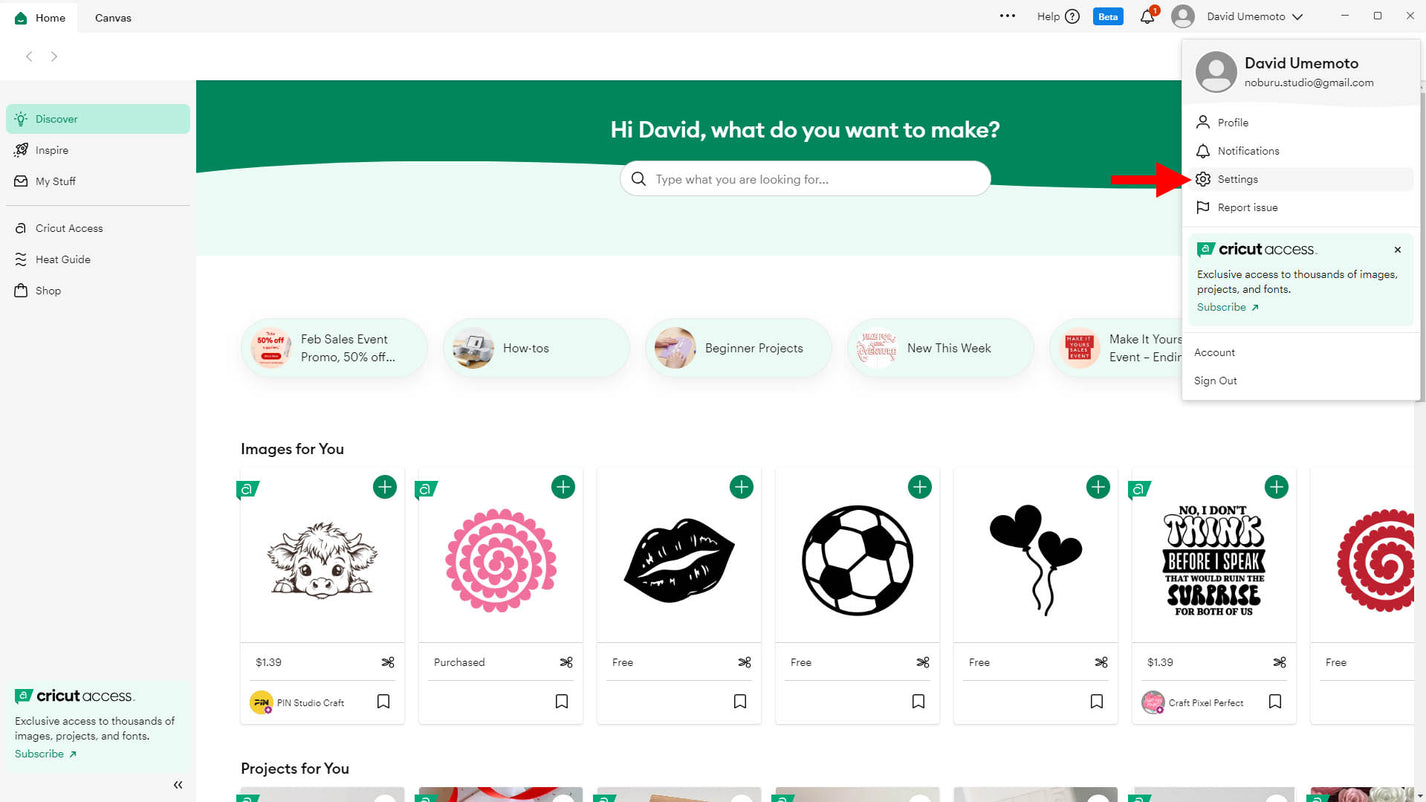
All my designs are created in metric units, so I’ll use them in this tutorial. If you prefer to work in imperial units, that’s perfectly fine. To change the default units, click the downward arrow next to your username in the upper-right corner of your screen to expand the menu.
STEP 2
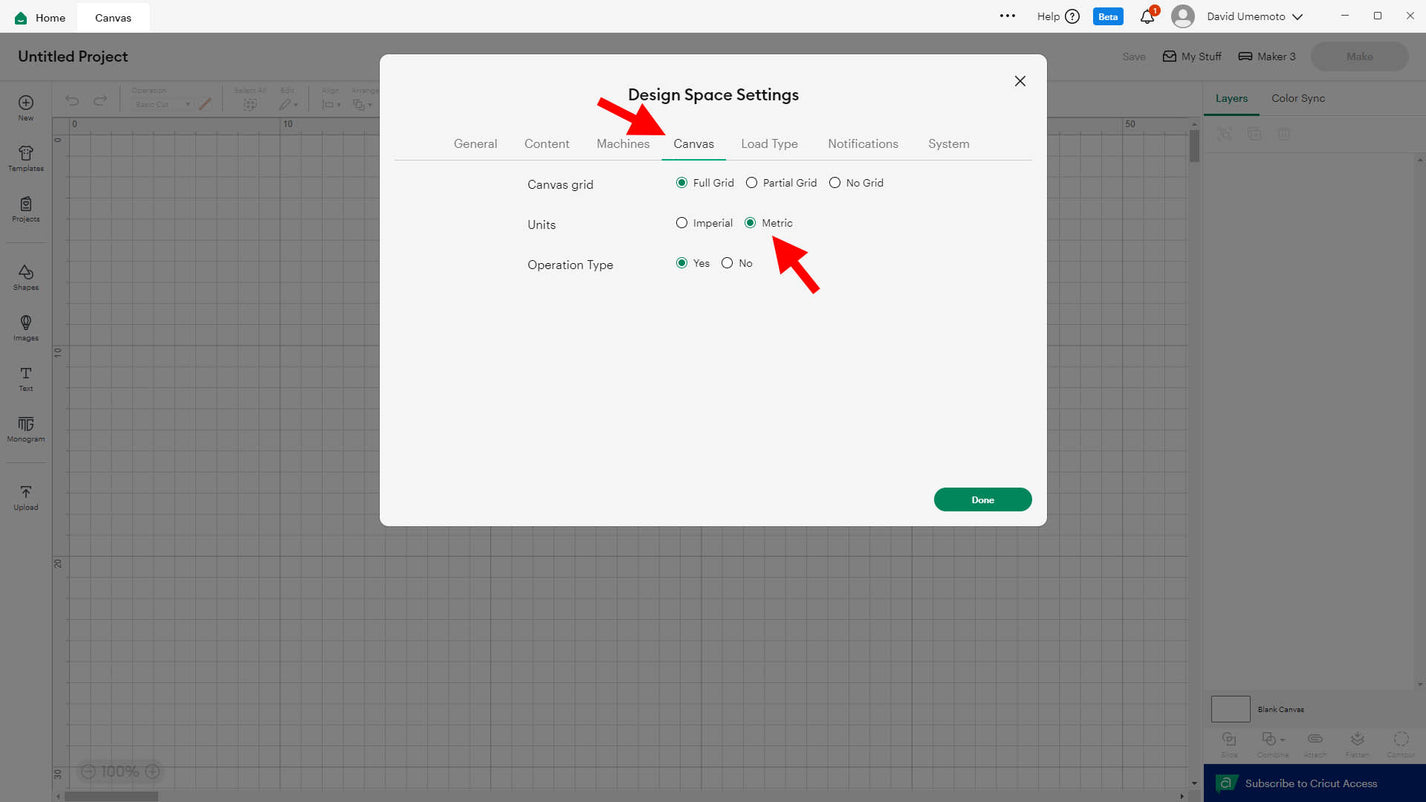
Click Settings.
STEP 3
Under Canvas, select Metric next to Units.
When you’re finished, click Done.
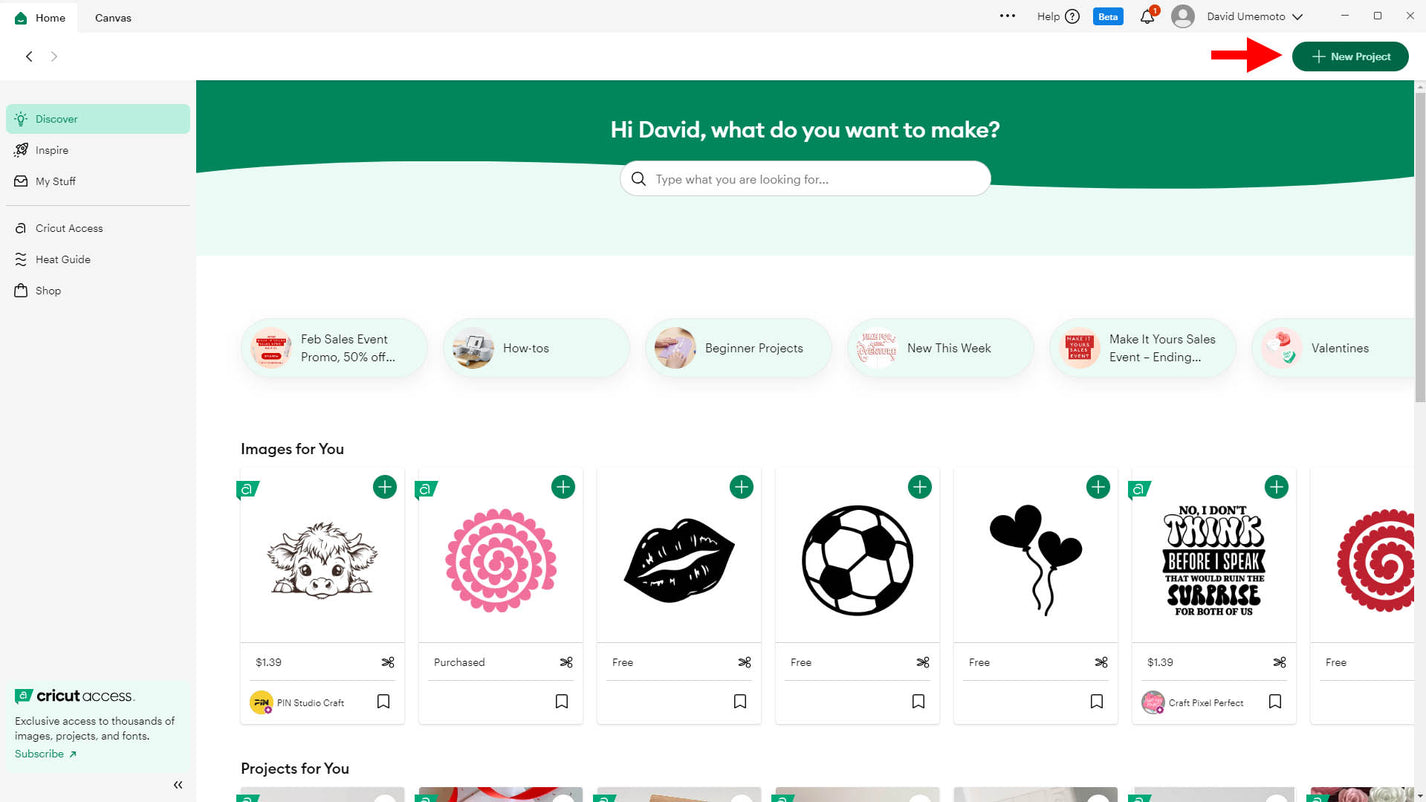
STEP 4
Still in the upper-right corner, start a +New Project.
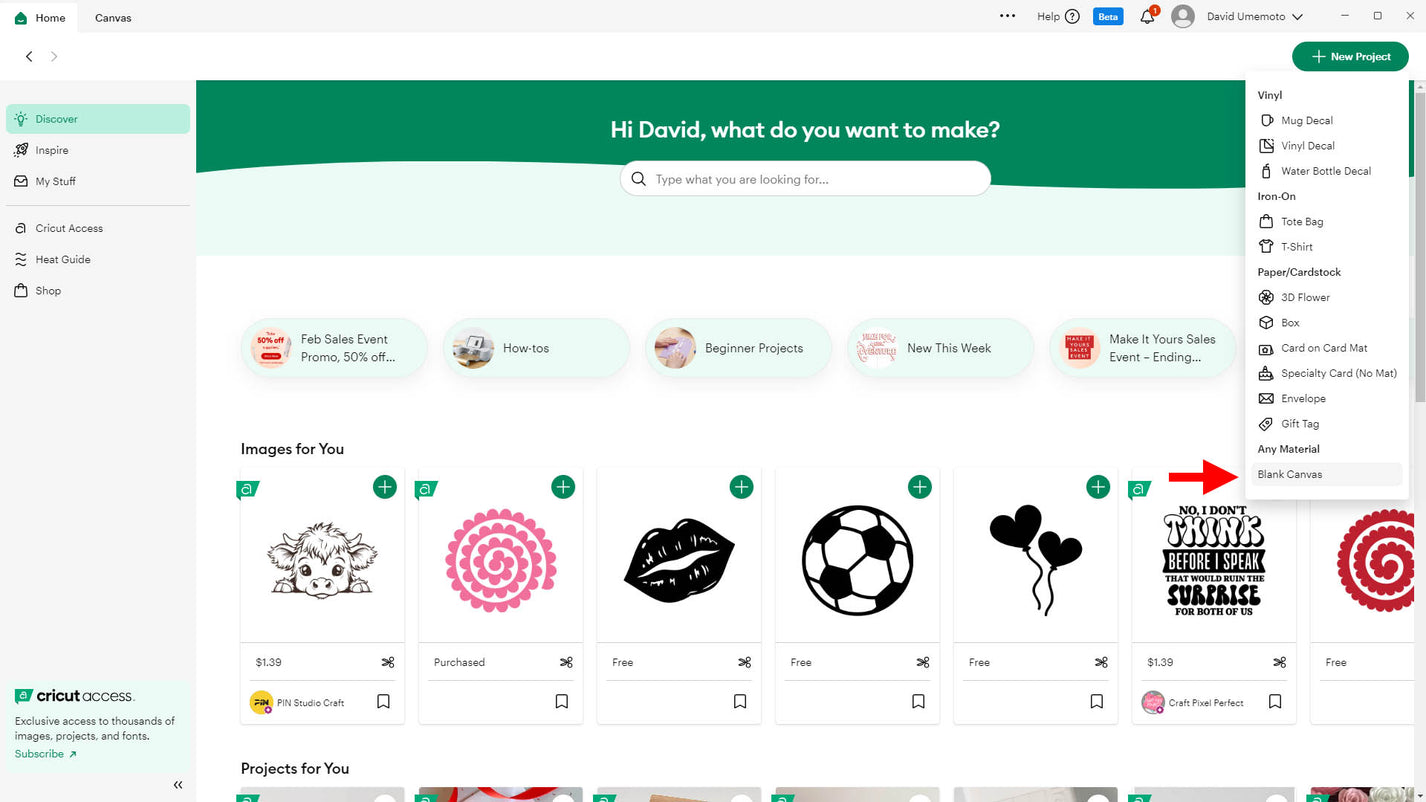
STEP 5
On the dropdown menu, select Blank Canvas (the last item on the list).
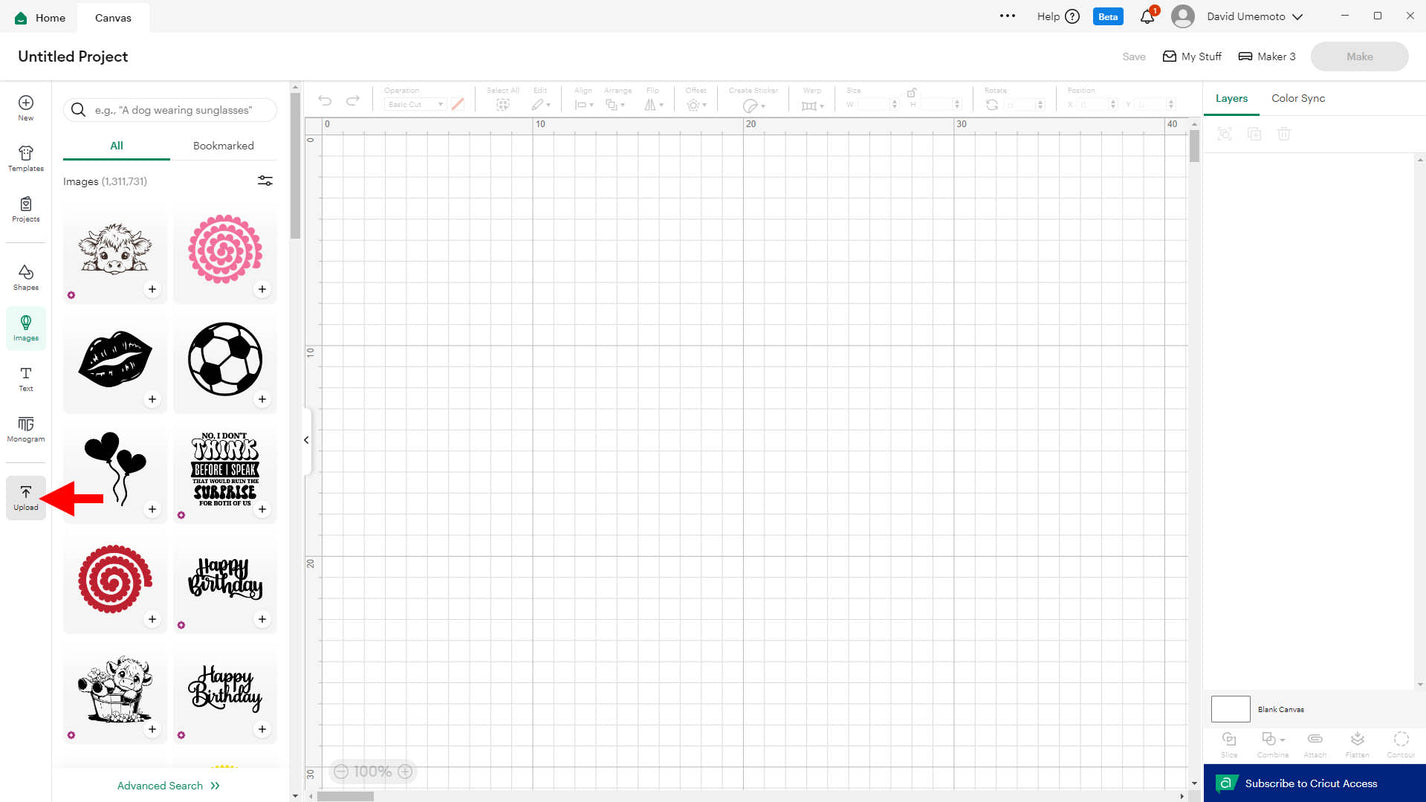
STEP 6
On the vertical menu on the left side, click Upload.
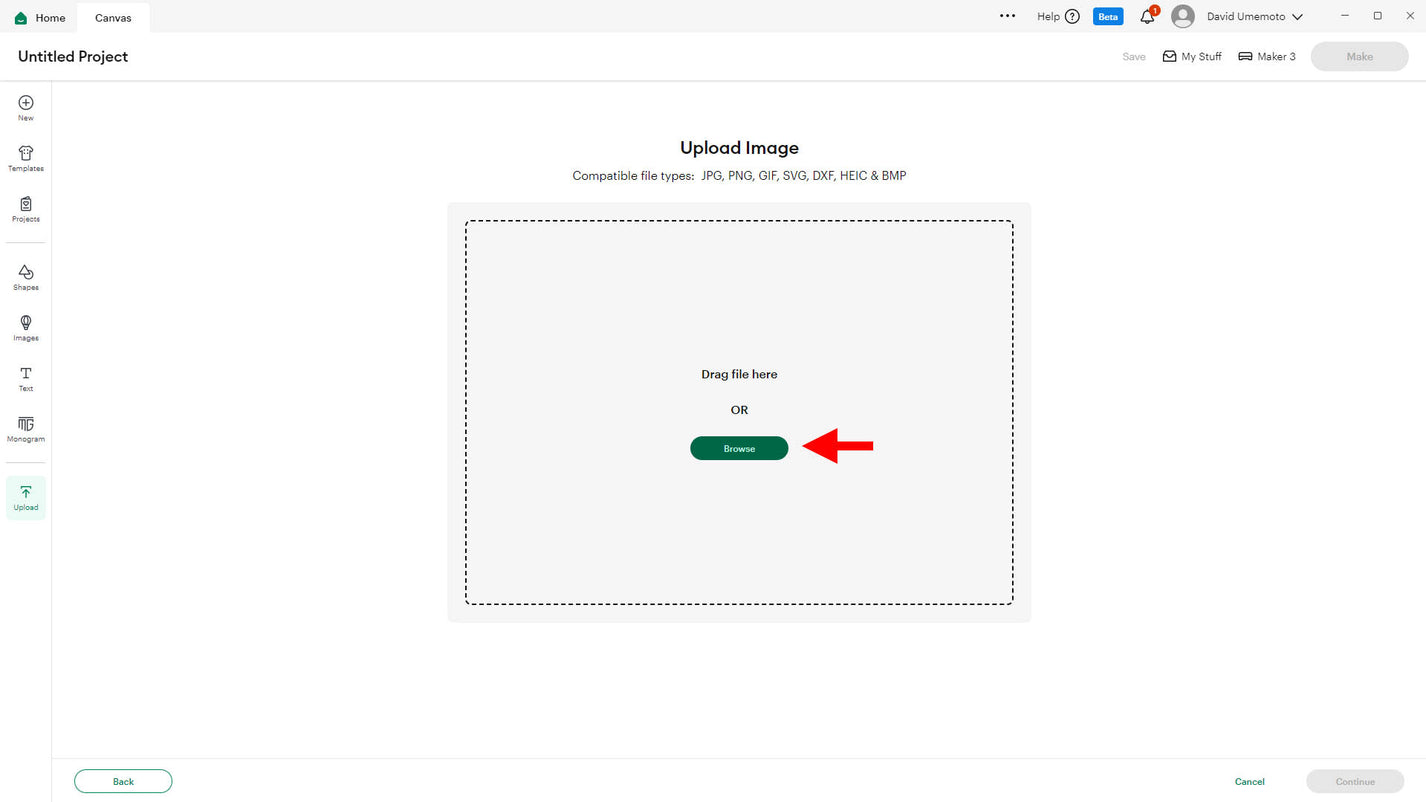
STEP 7
Click the button Upload Image.

STEP 8
Click the button Browse.
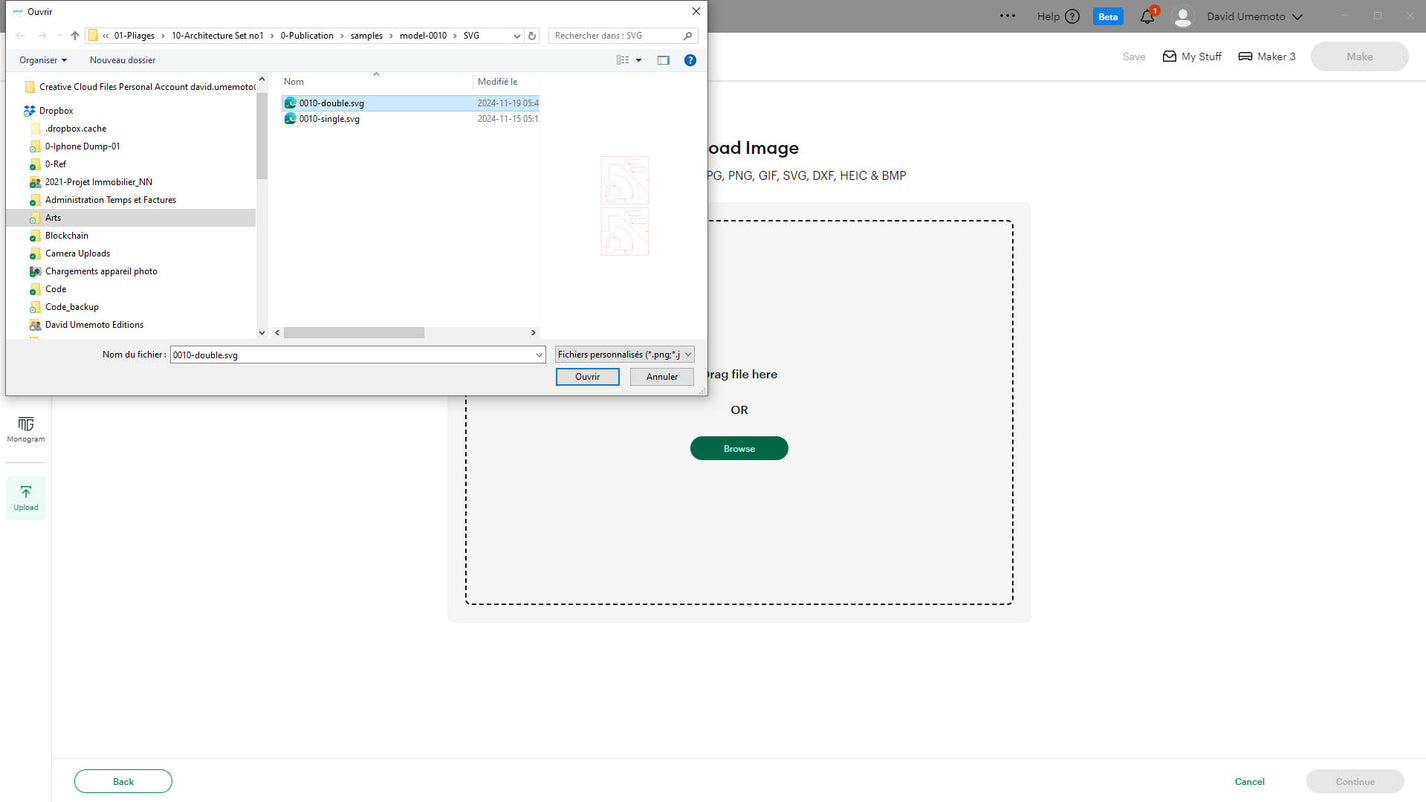
STEP 9
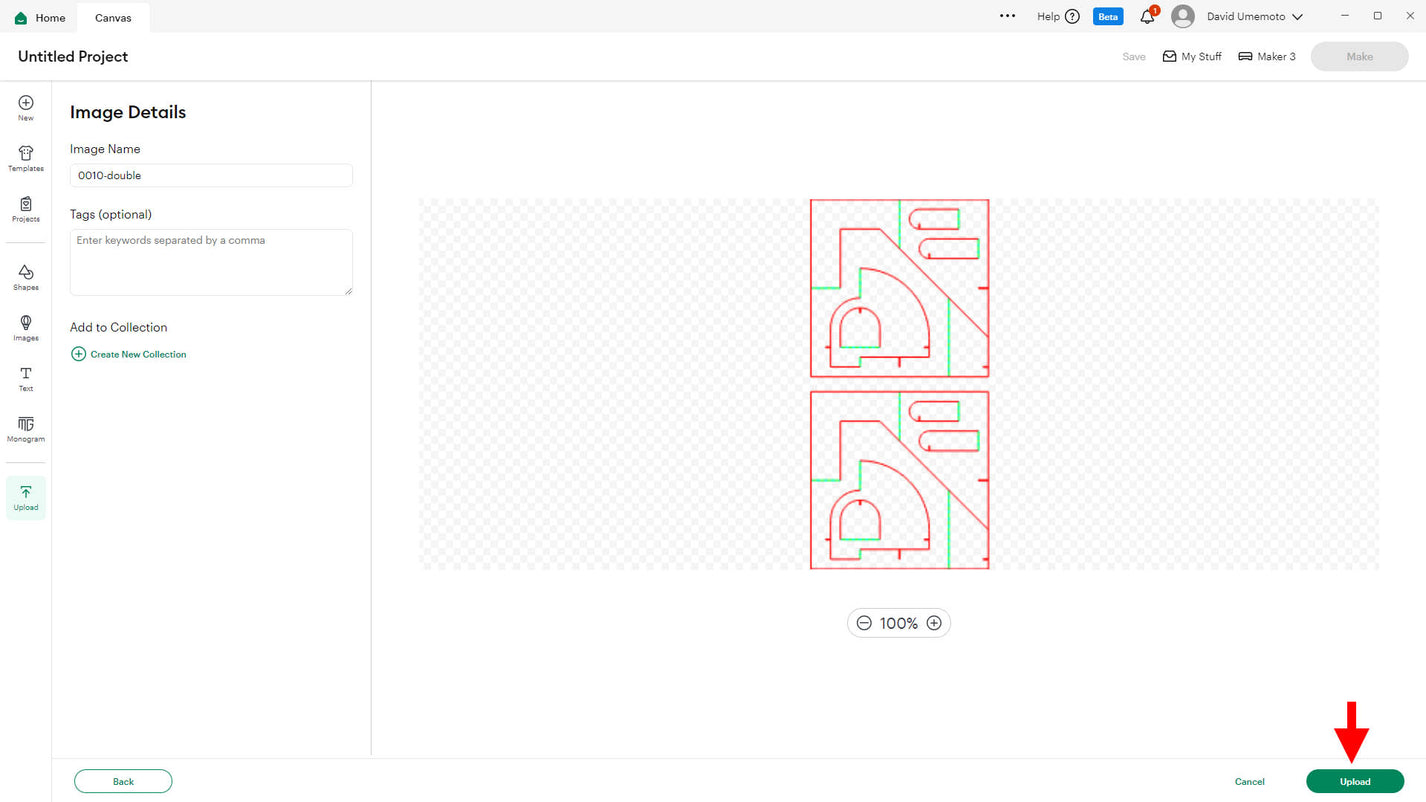
Open an SVG file.
For this demo, choose a “double layout” SVG file if you can. These layouts contain two models in the same file.
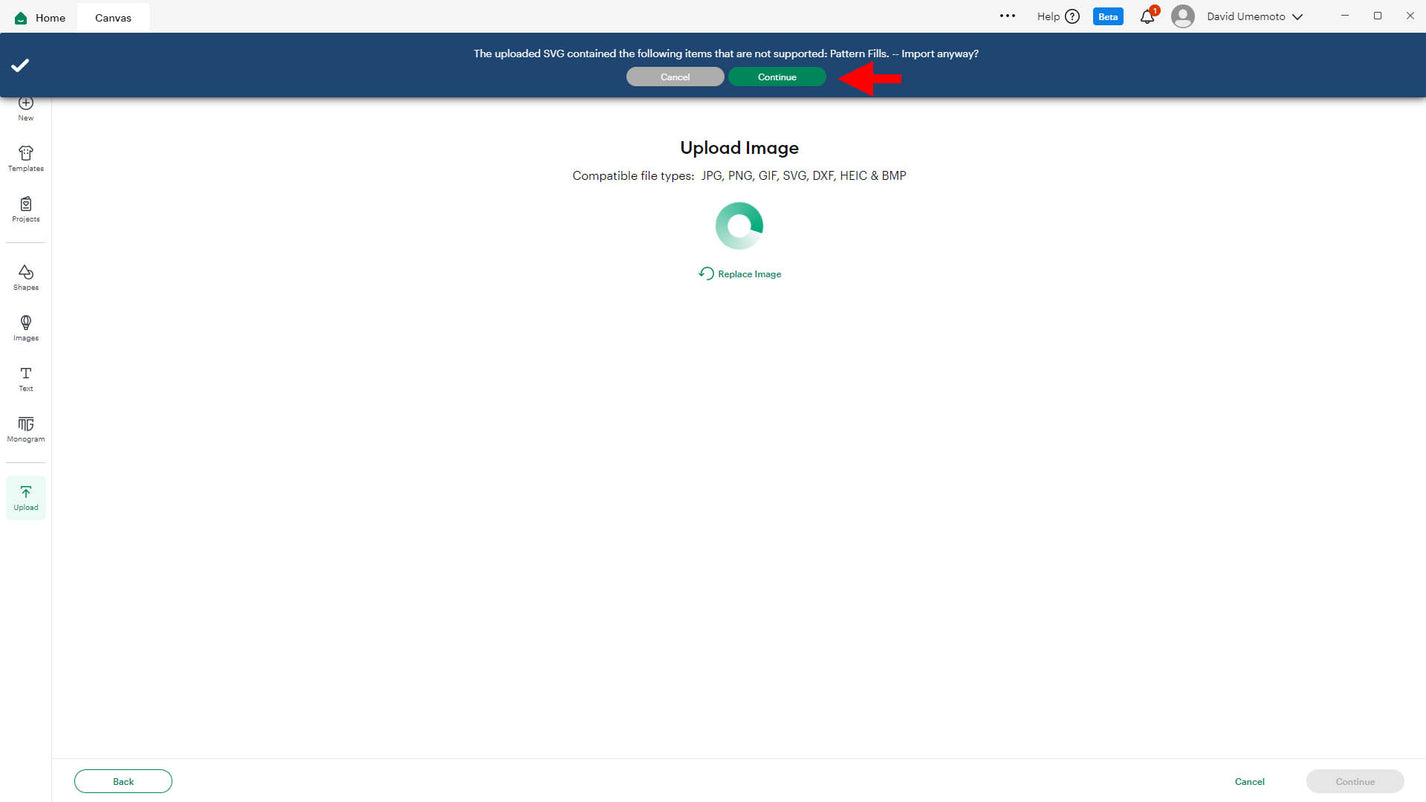
STEP 10
If you get this message, just click Continue.
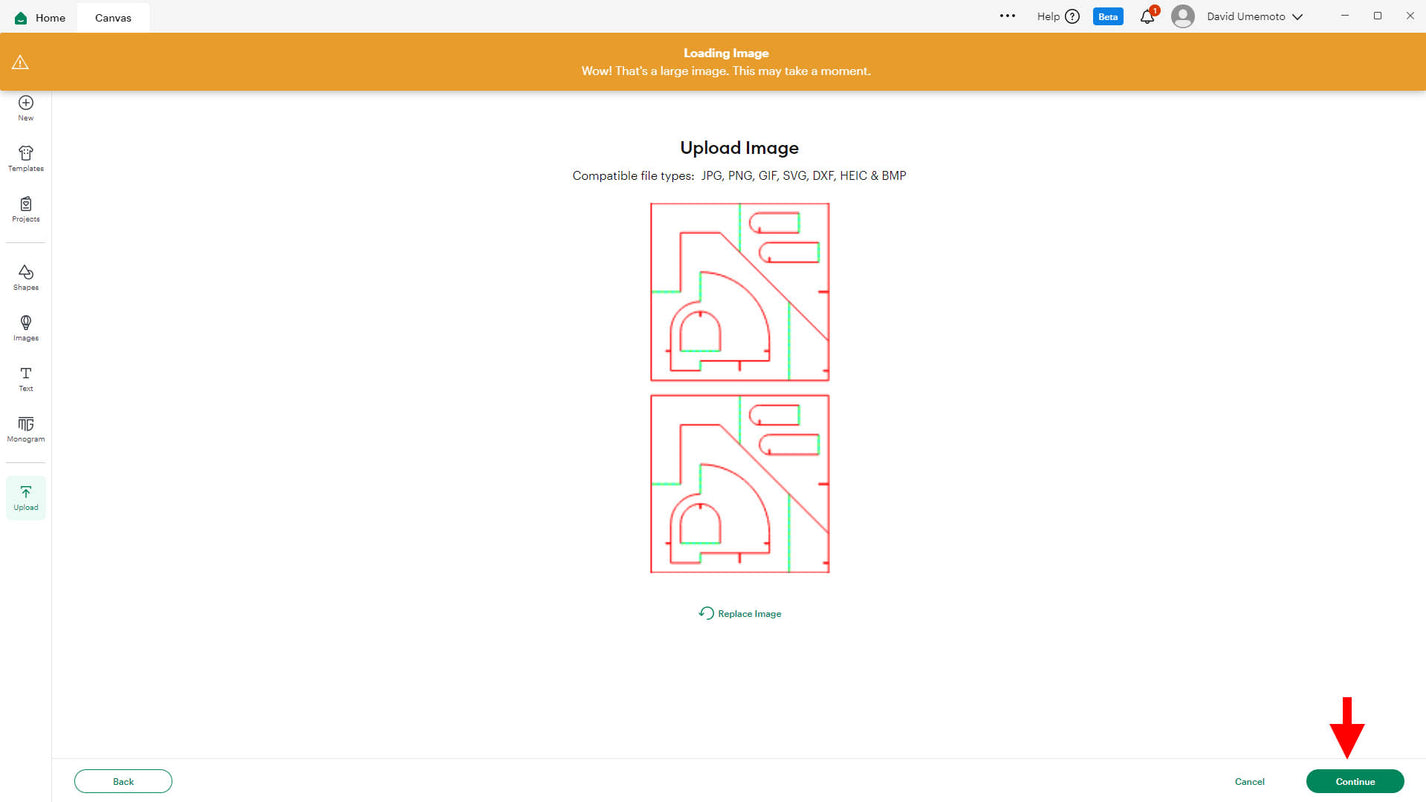
STEP 11
Click Continue.
STEP 12
Click Upload.
STEP 13
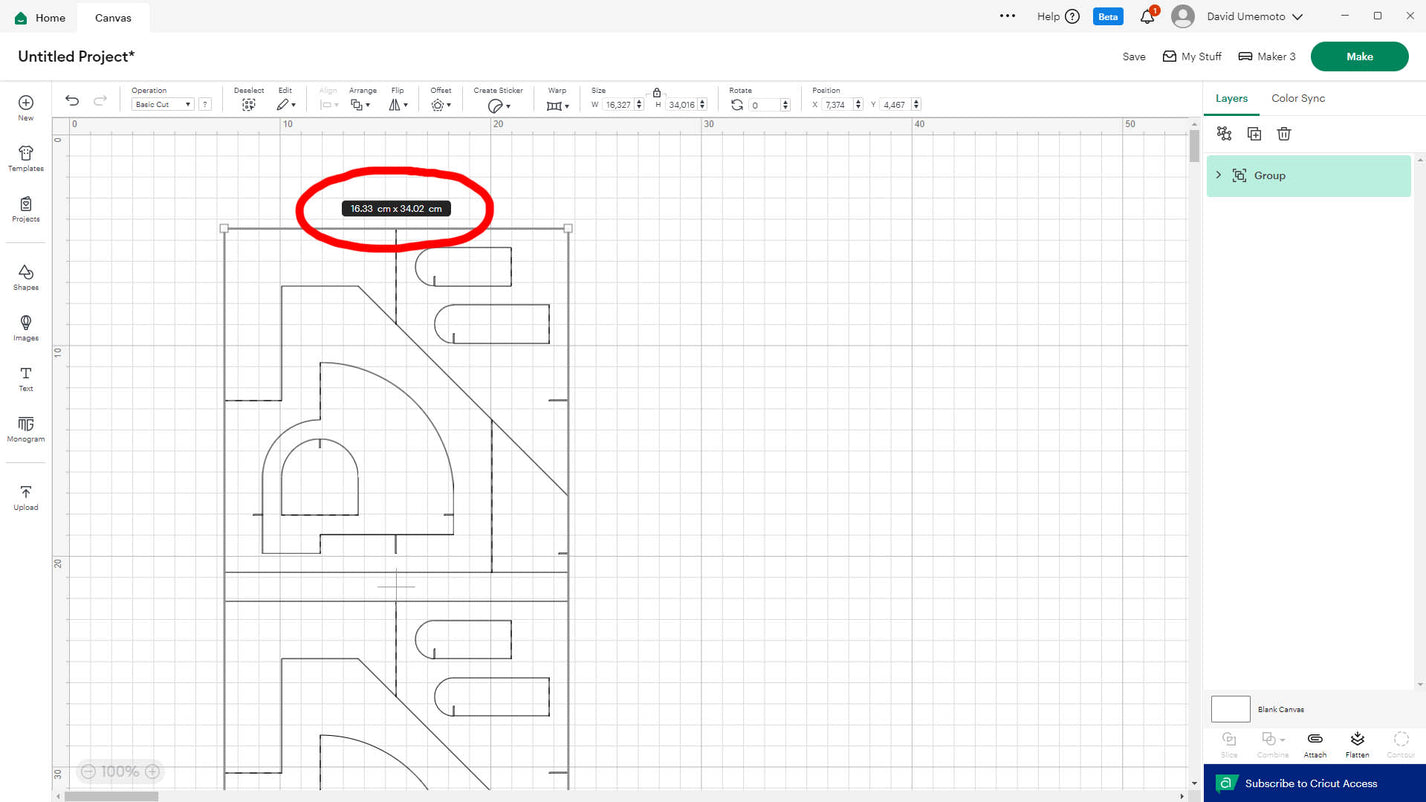
Verify the dimensions of the design. These may vary depending on your settings.
You can leave them as is or rescale the design (next)
STEP 14
Here’s how to rescale the design:
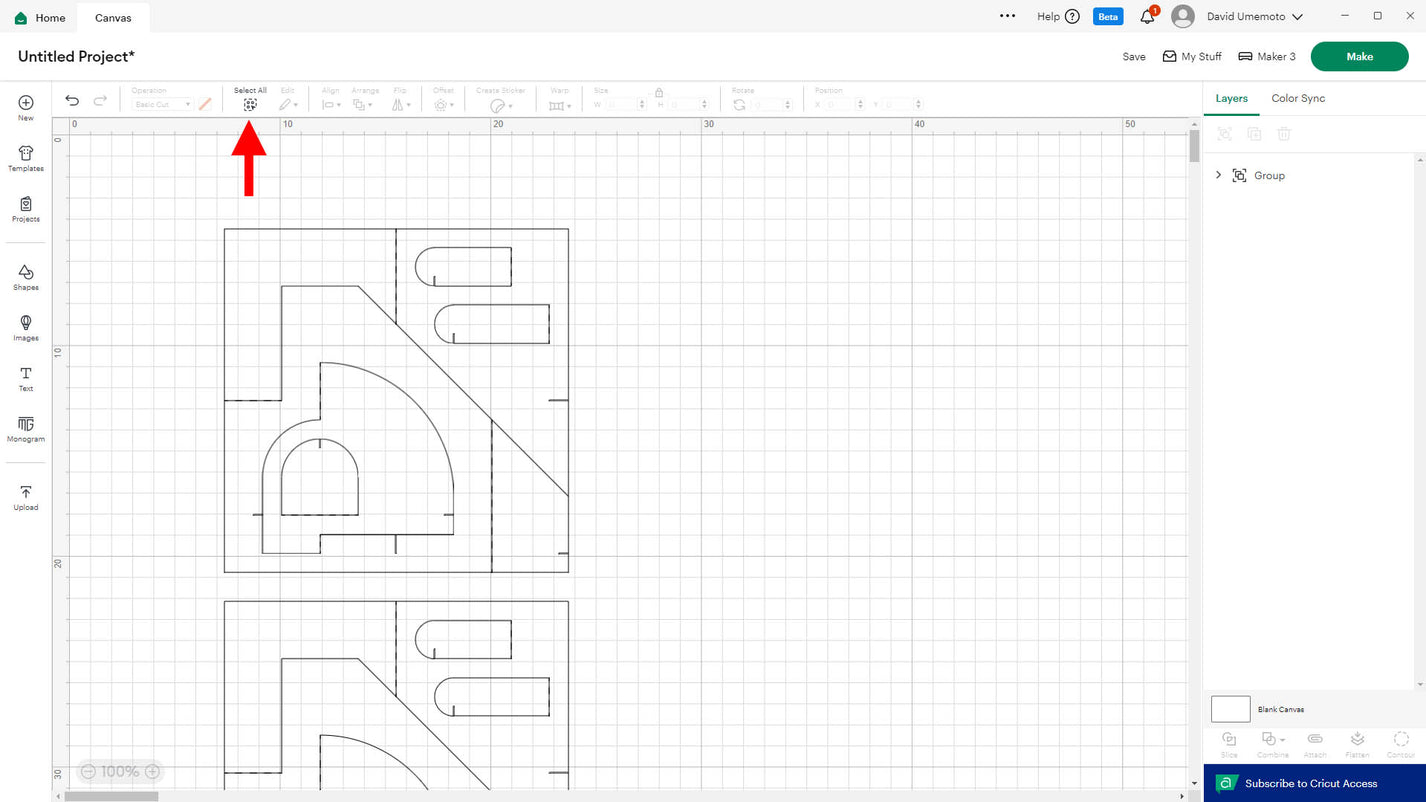
If you haven’t clicked anywhere else, the whole design should already be selected.
If it isn’t, press CTRL/COMMAND + A, or click the Select All icon in the menu.
STEP 15
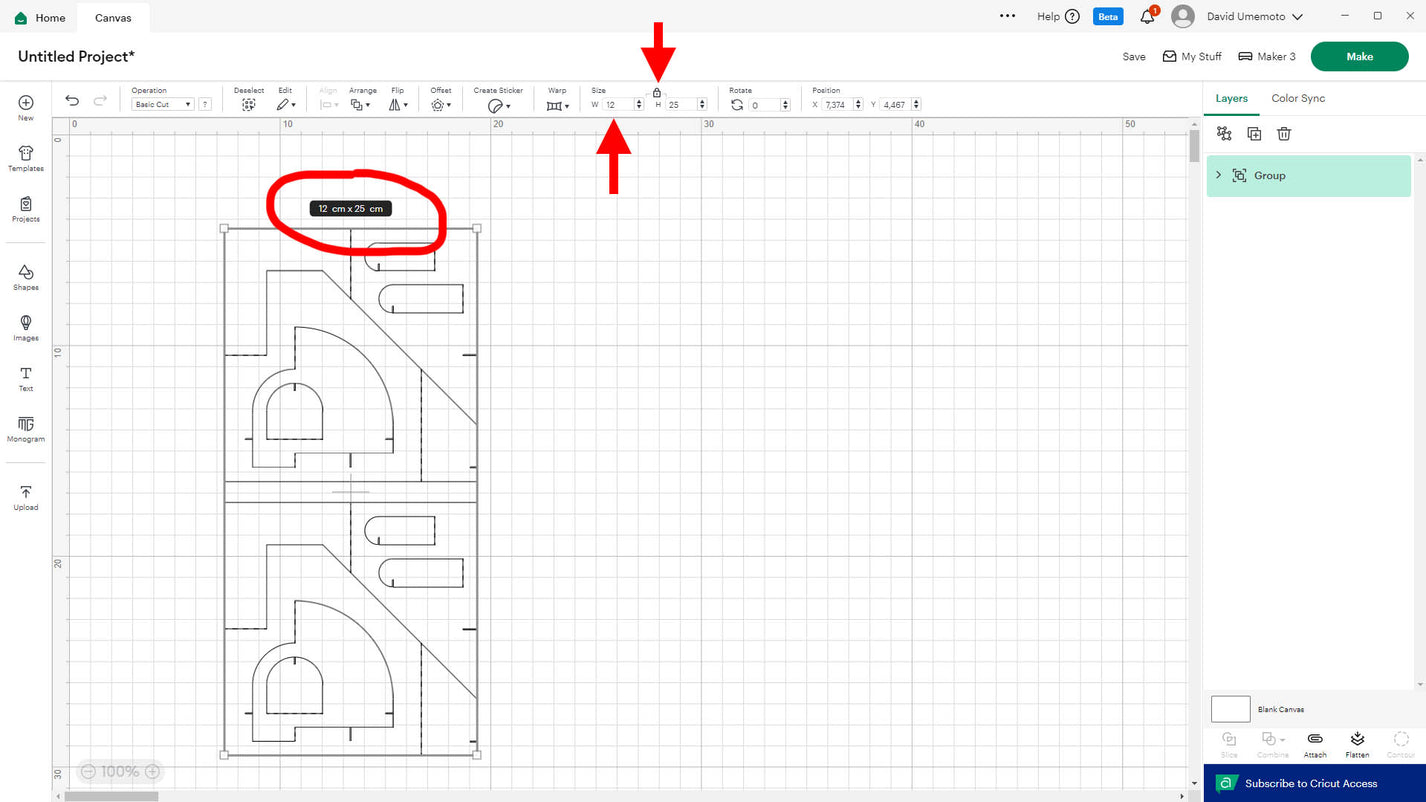
Ensure the “lock” icon is set to lock (this maintains proportional scaling).
Enter the desired dimensions in the boxes next to the lock and press Enter. Your drawing will be rescaled to the new dimensions.
When cut from 80 lb/216 gsm cardstock, this specific layout, like all my “double layouts,” is designed to be 12 cm horizontal x 25 cm vertical.
That woul be approximatively 4,75 in horizontal x 10 in vertical
STEP 16
Now would be a good time to save your project.
Click Save in the top-right menu.
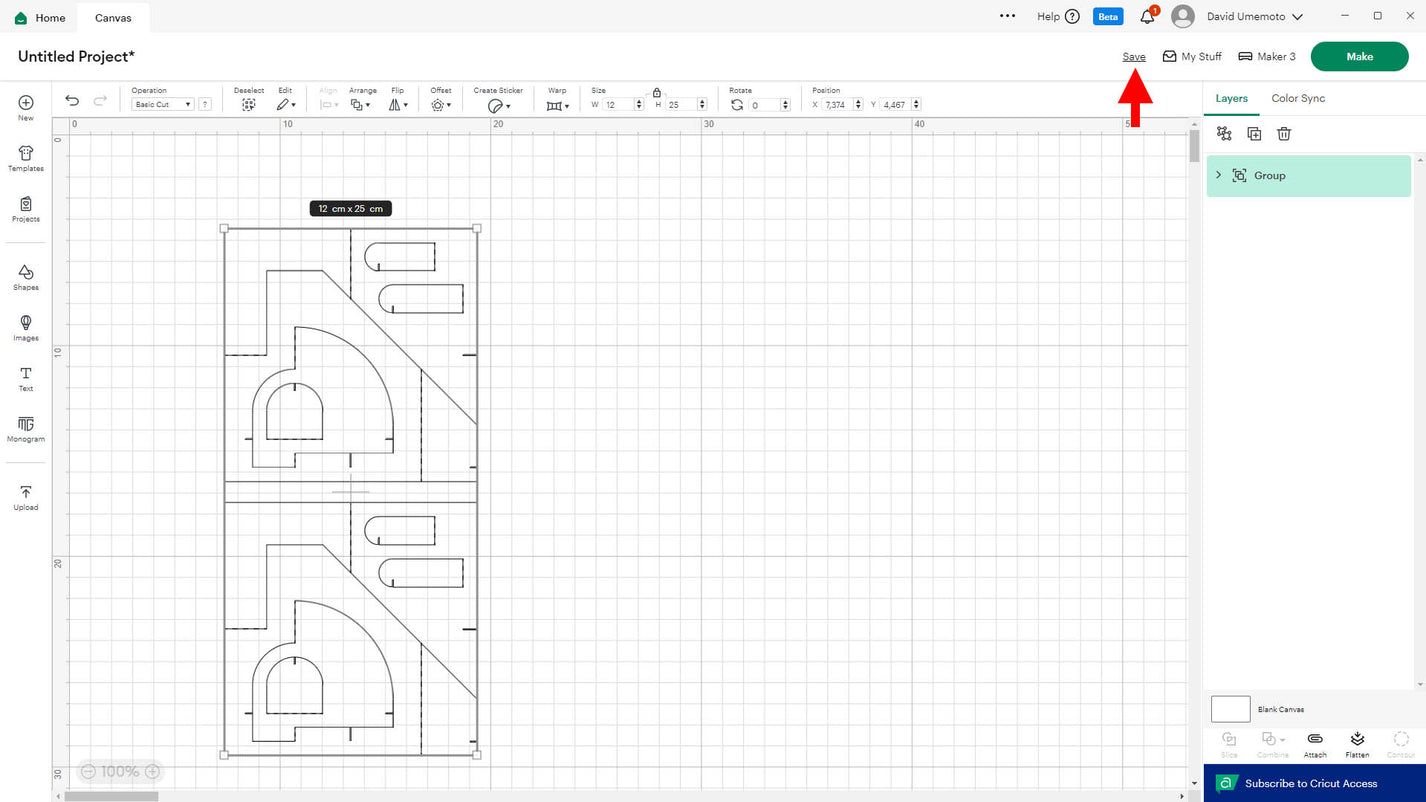
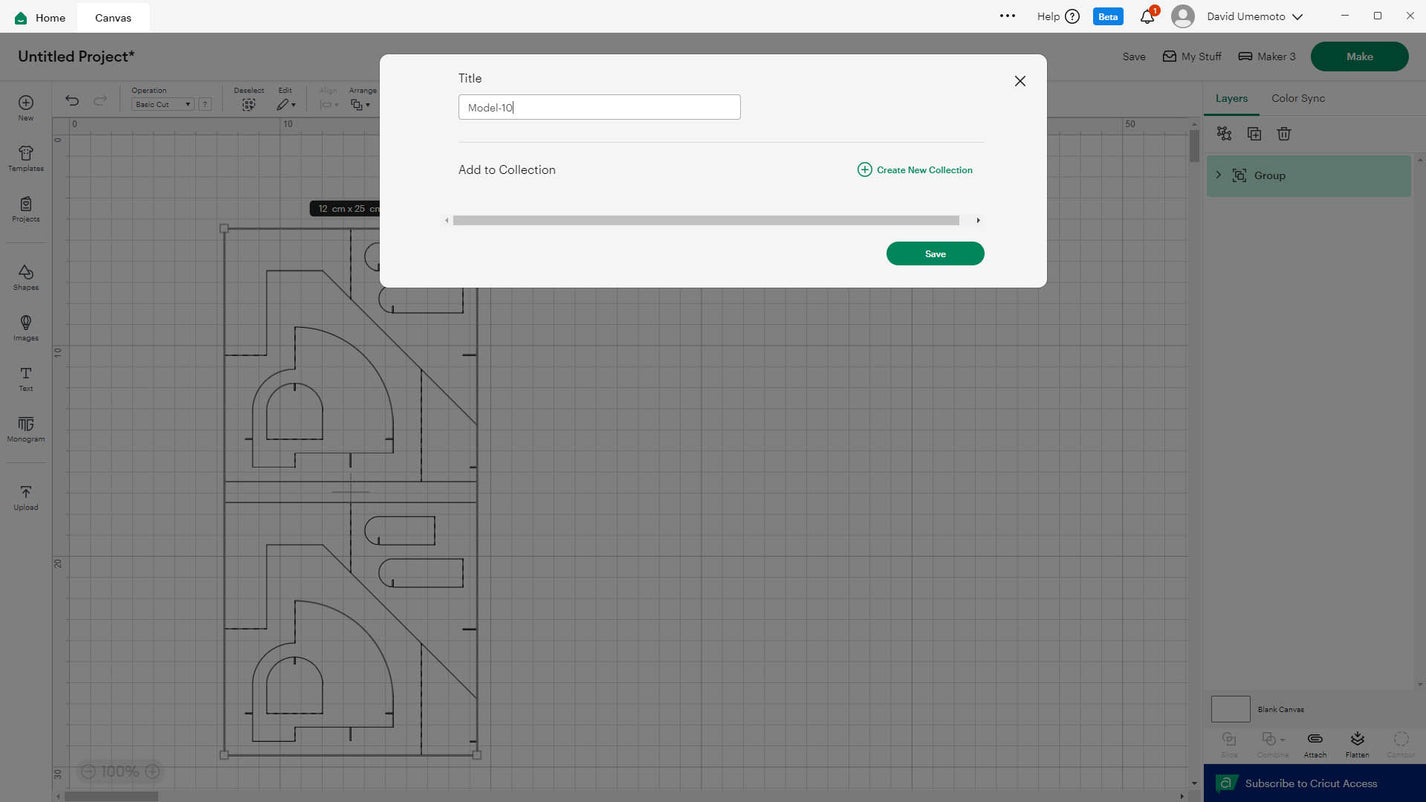
STEP 17
Enter a name, then click Save.
STEP 18
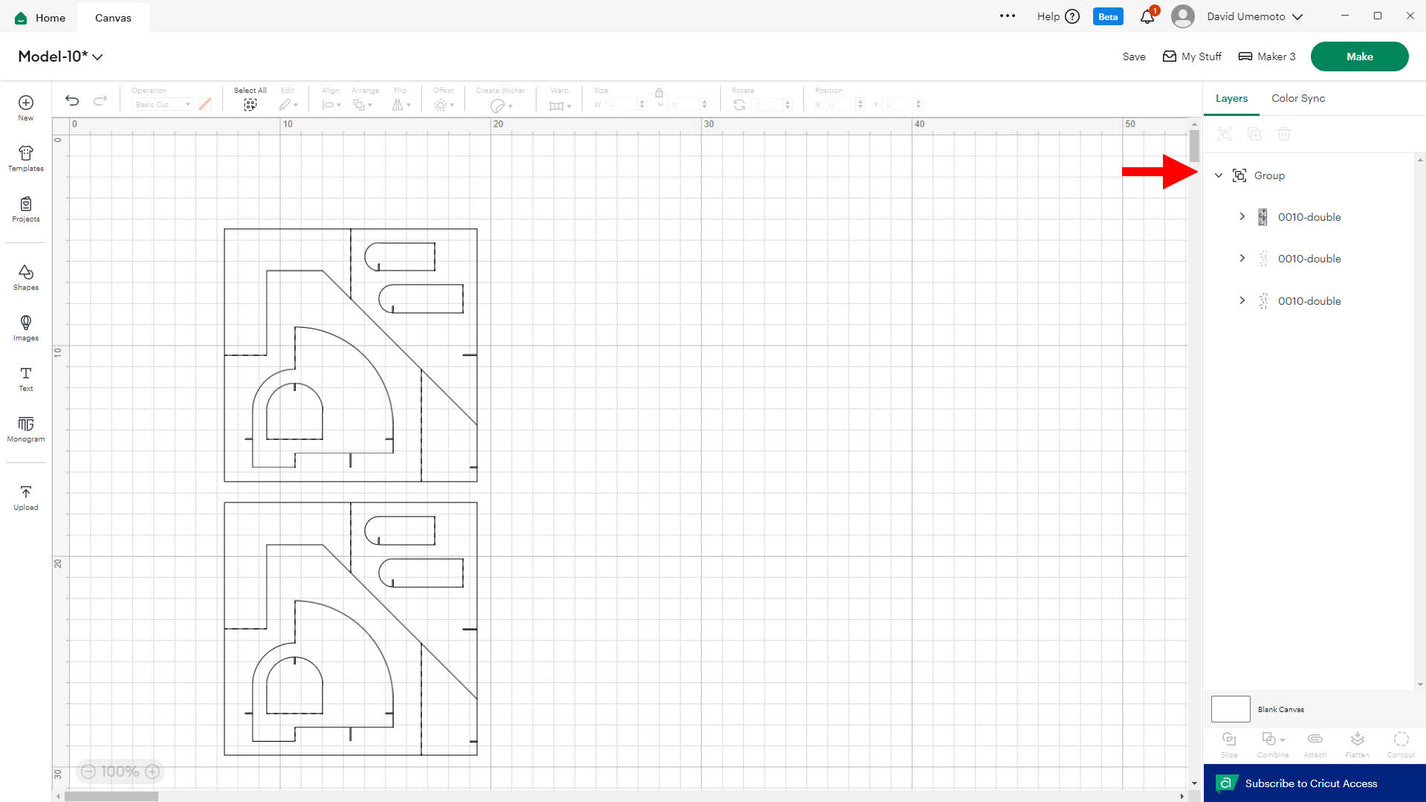
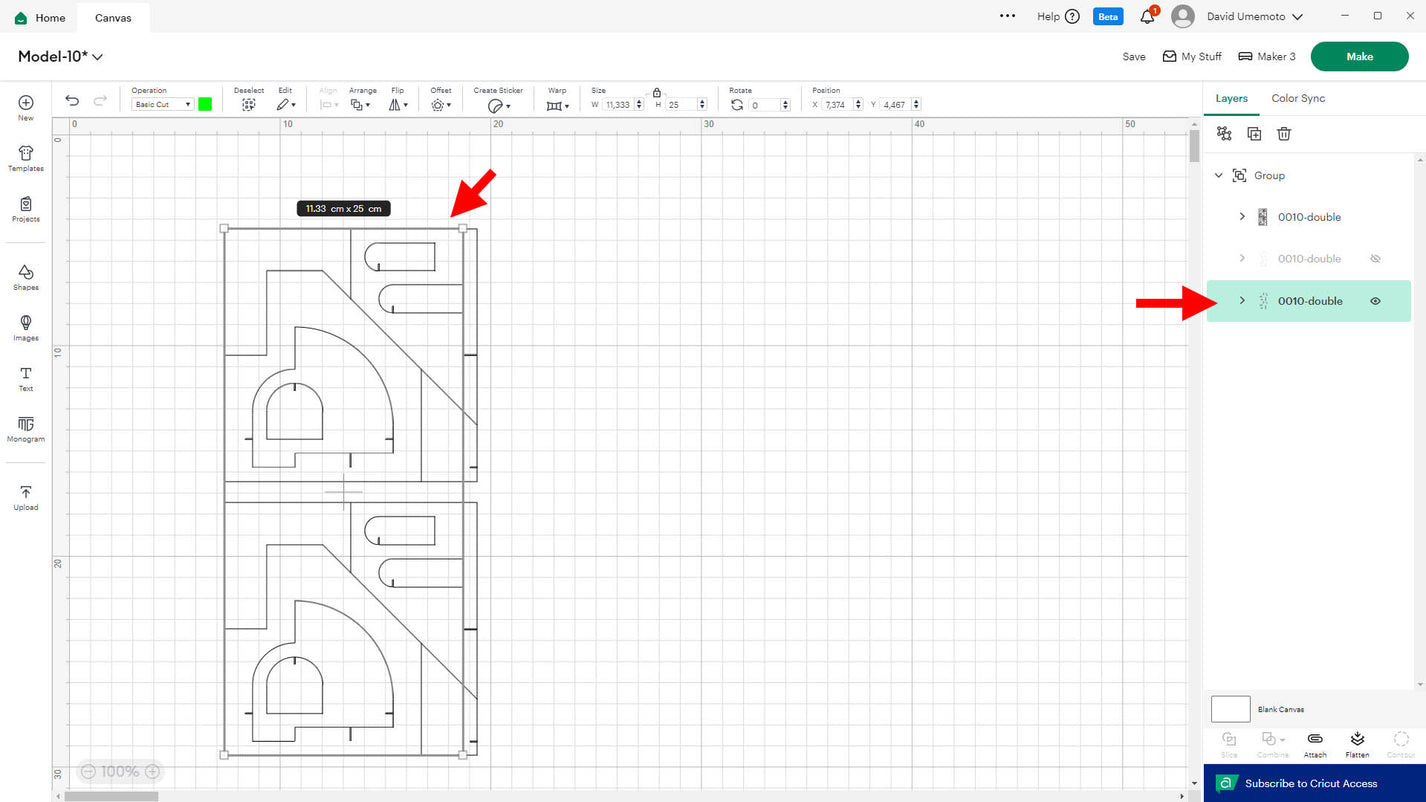
Expand the Group menu on the right side of the screen. You’ll see all layers in the design. Unfortunately, layer names aren’t preserved when importing SVG files into Design Space, so they all appear with the same name. However, the layer order is preserved. From top to bottom, the layers are:
1. Cut lines
2. Scoring lines (for blade tool)
3. Scoring lines (for scoring tool, e.g., stylus or scoring wheel)
Note that in rare occasions, you may have a fourth layer. If present, this layer labeled as “drawing lines” will utilize the second clamp of your machine with a pen to draw the lines.
STEP 19
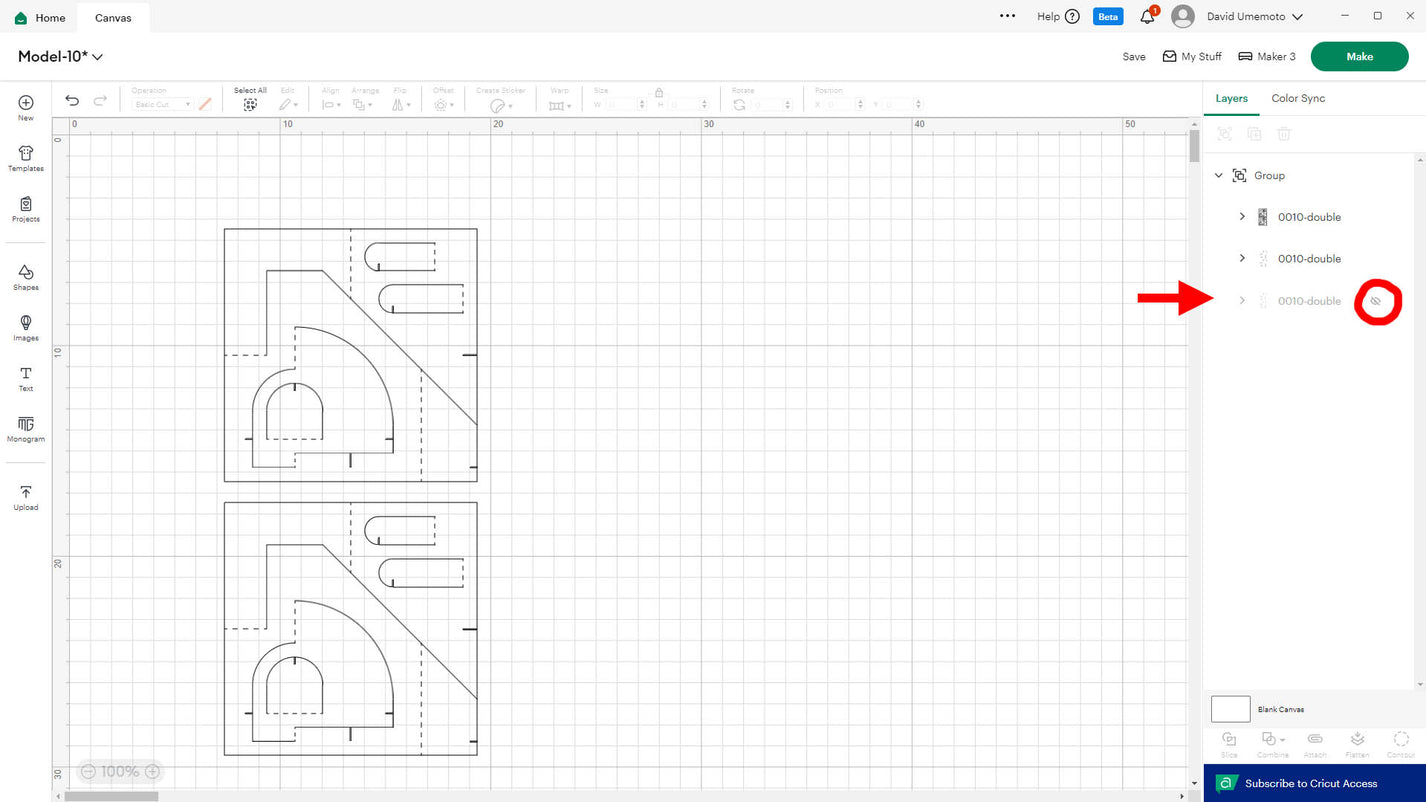
If you don’t have or don’t want to use a scoring tool (I don't), turn off the third layer.
The machine will use the blade to make small cuts for scoring lines.
Skip the next few slides
STEP 20
If you’re using a scoring tool, turn off the second layer.

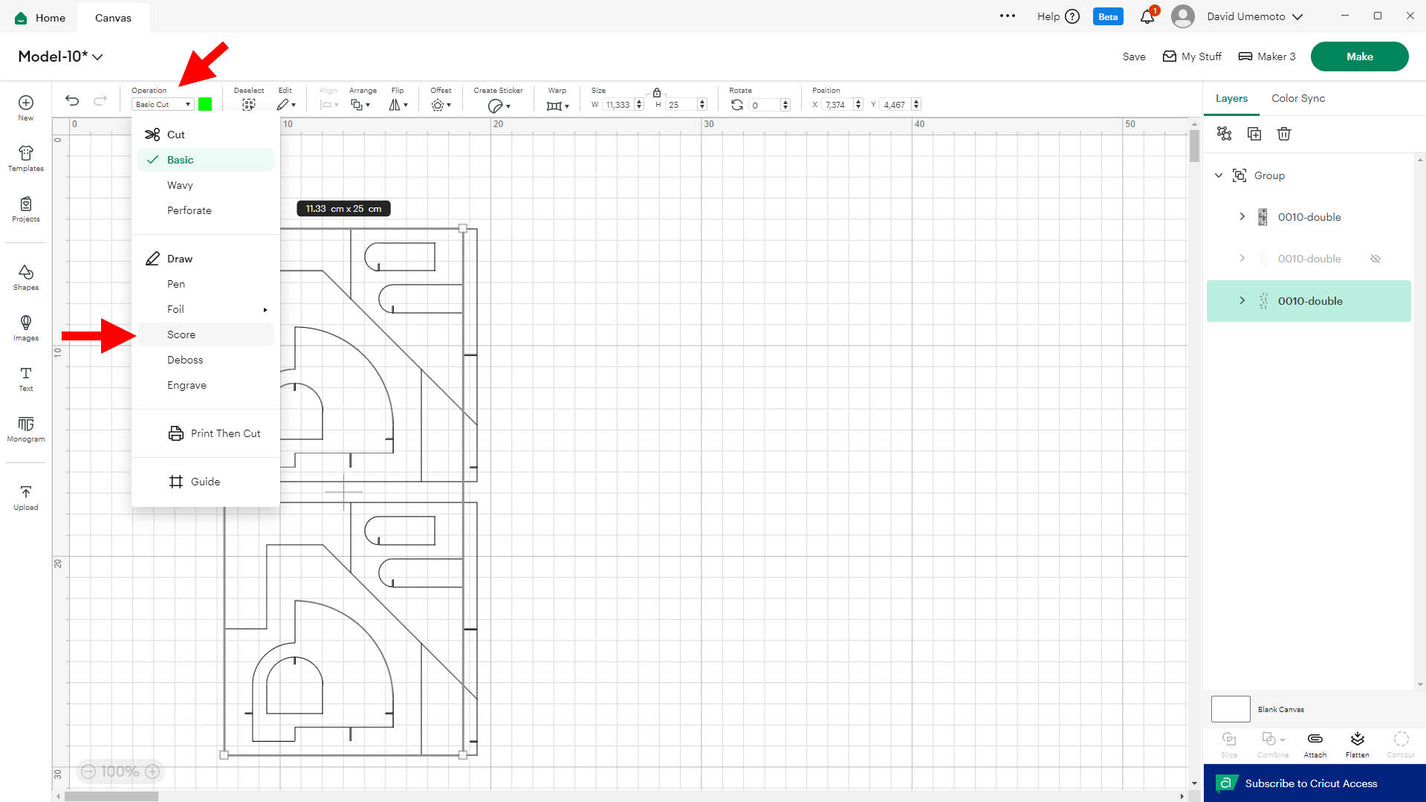
STEP 21
Double-click the third layer to select it (it will turn green).
You’ll see a selection box around the scoring lines.
STEP 22
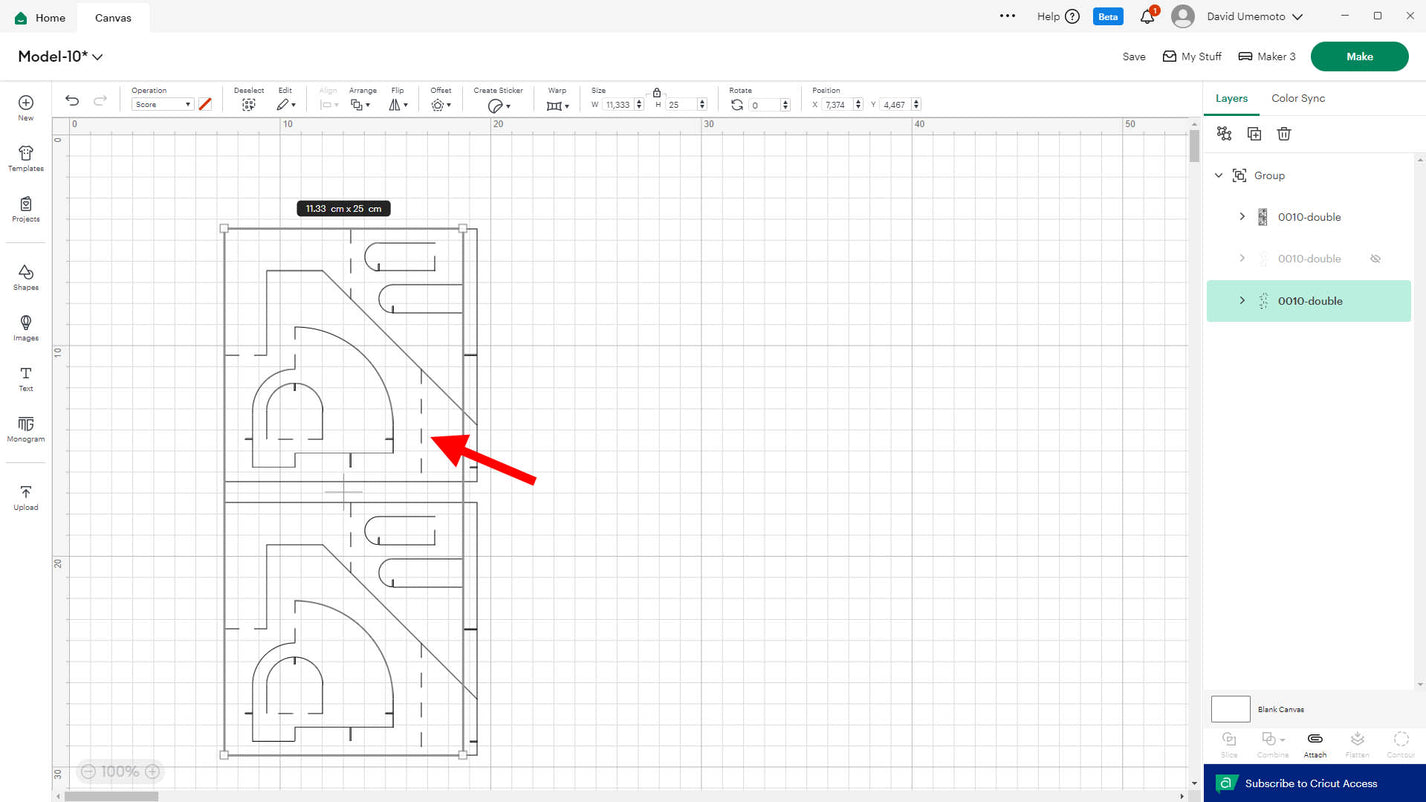
In the top menu, expand the Operation dropdown and select Score.
STEP 23
The score lines will now appear as dashed lines, indicating they’ll be handled by the scoring tool.
STEP 24
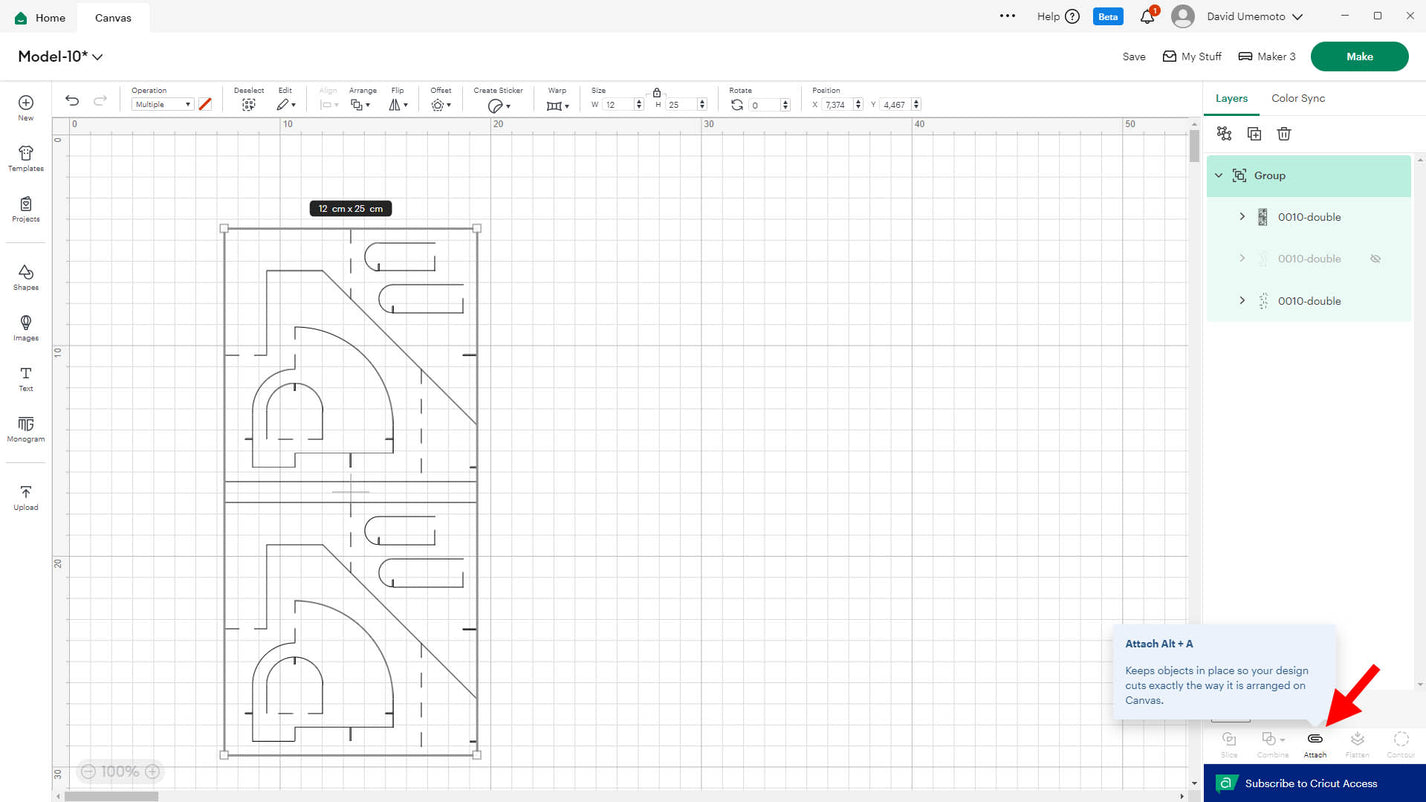
If you’ve previously decided to use the blade only, it’s time to jump back in.
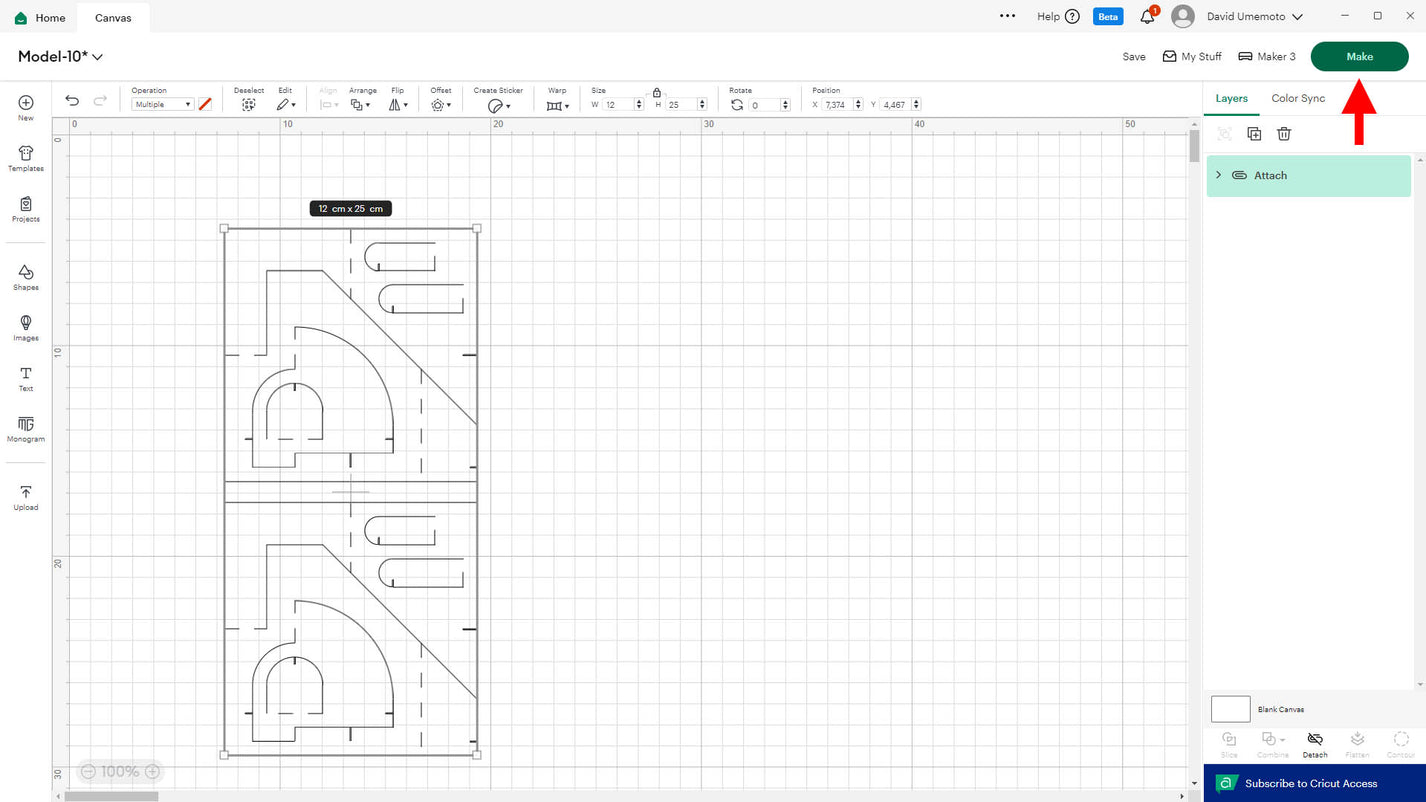
Select your whole drawing (CTRL/COMMAND + A), then click on the Attach icon in the lower-right corner.
STEP 25
Your design is now ready to be cut.
Click the Make button in the top-right corner.
STEP 26
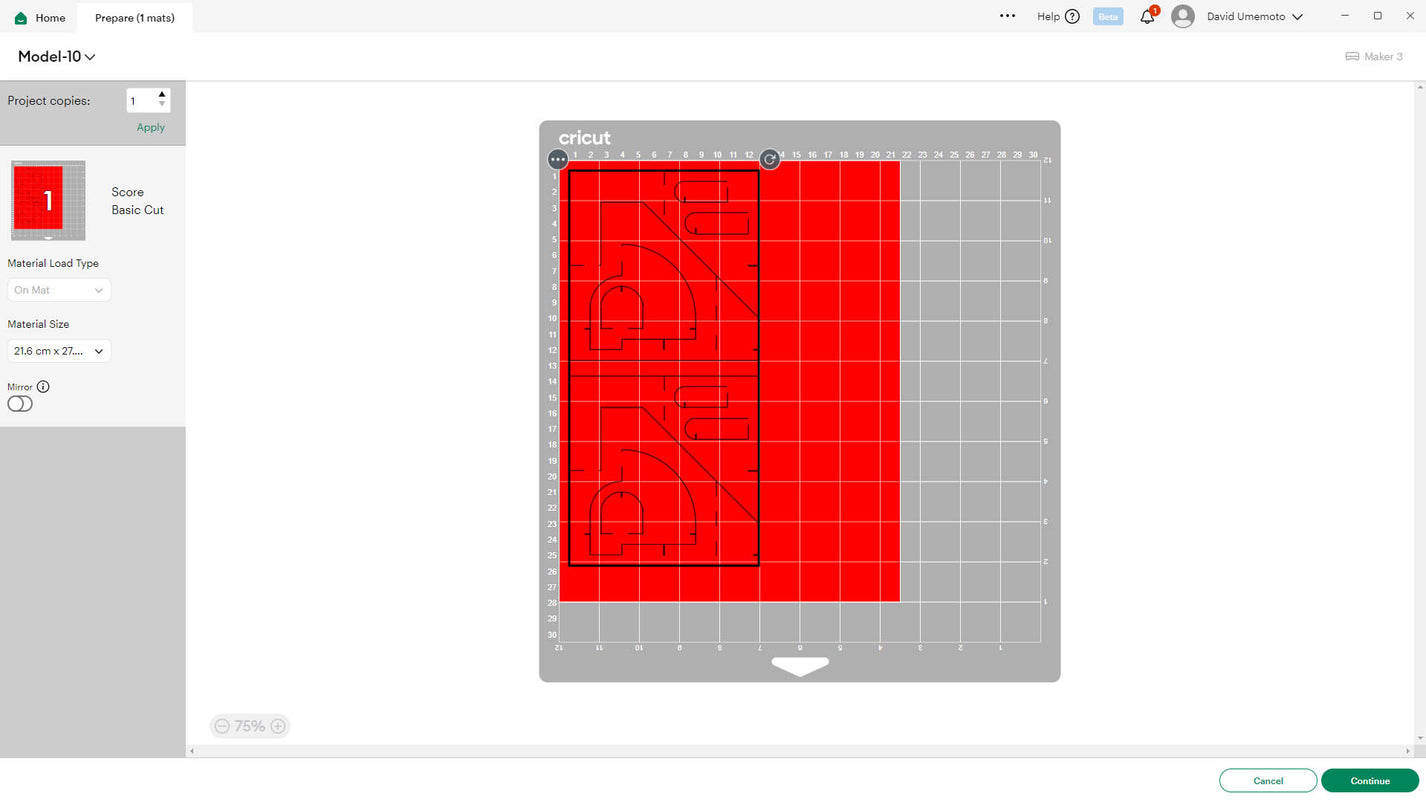
Select your material size from the dropdown on the left.
With this layout, you can use either US Letter or A4 paper size

STEP 27
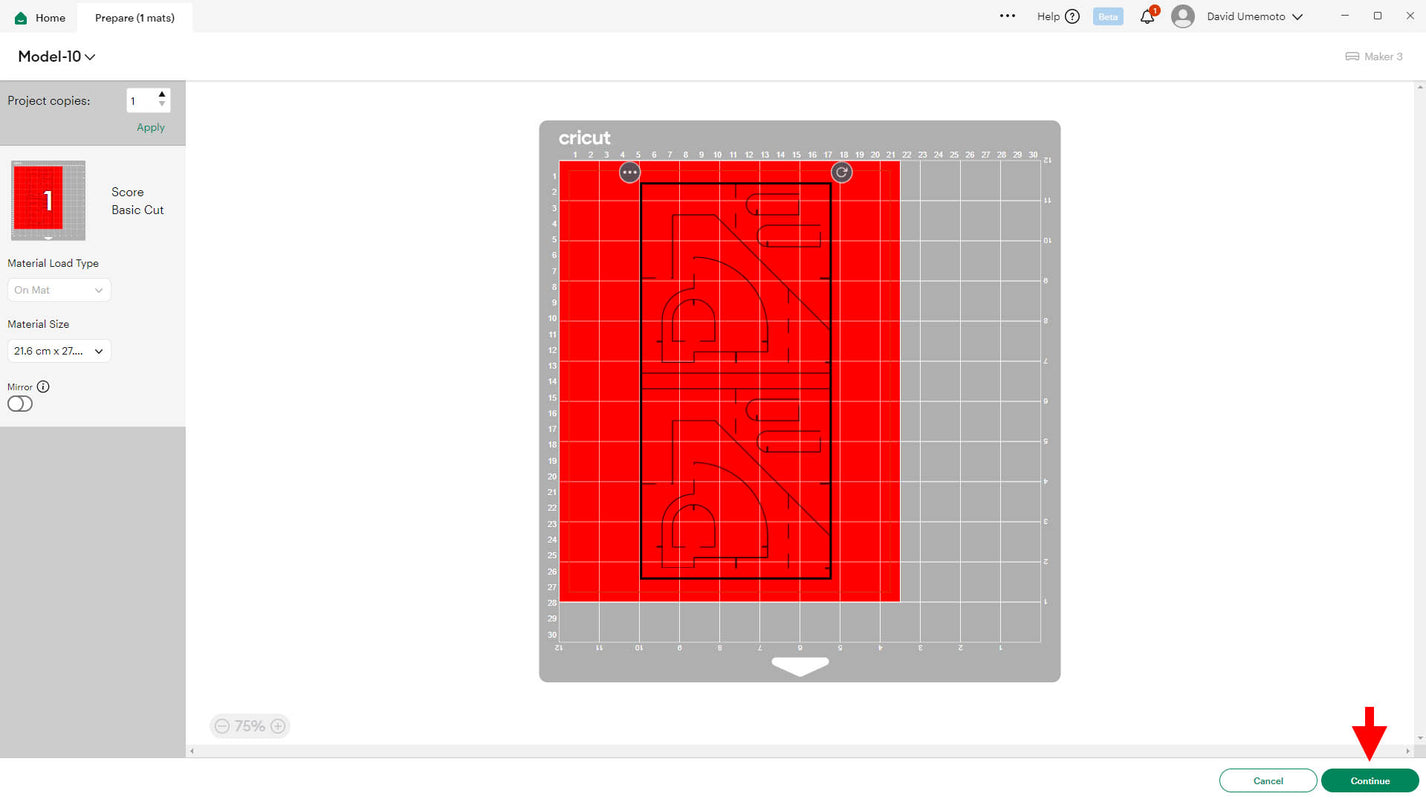
Click and drag your design to reposition it on the virtual cutting mat, if necessary.
STEP 28
Click Continue in the bottom-right corner.
STEP 29
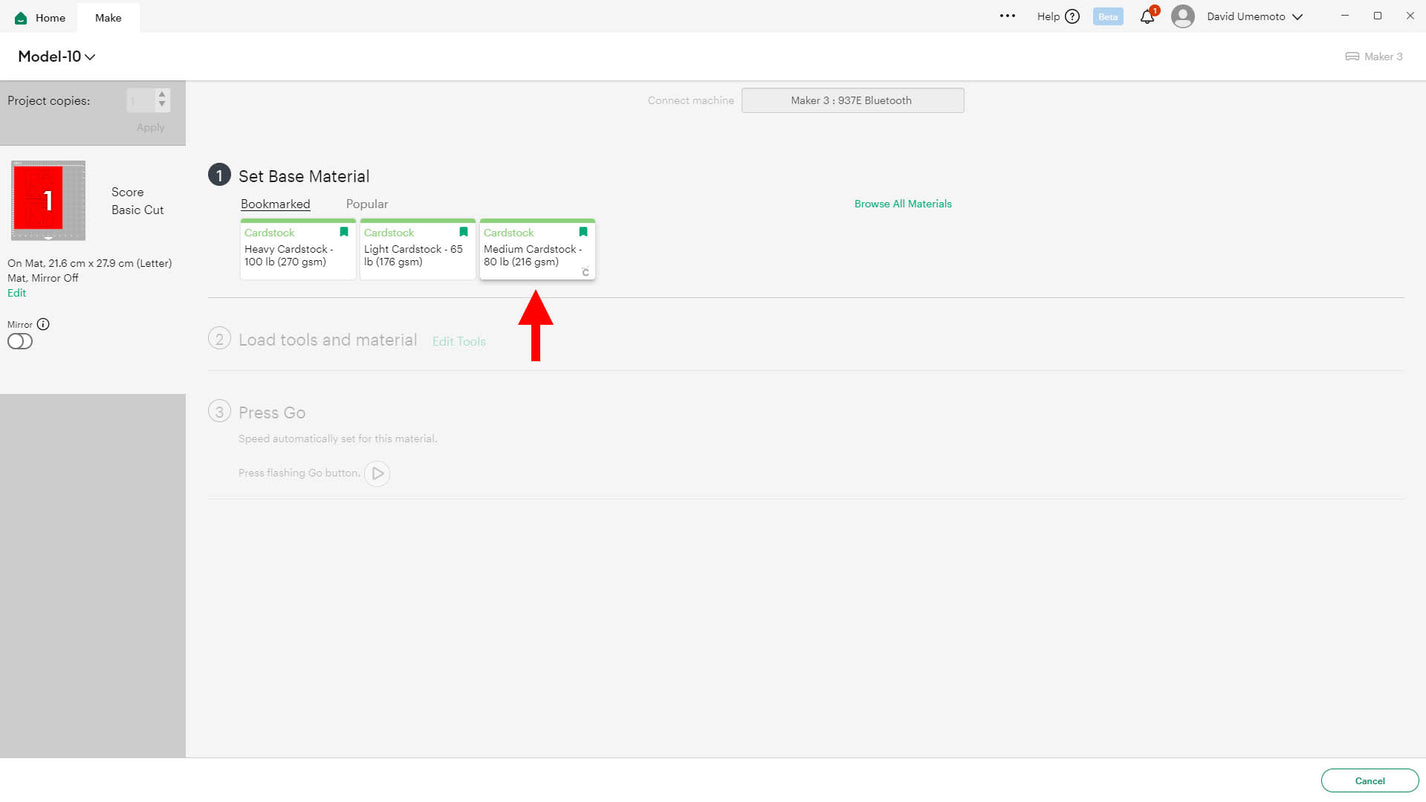
Select the paper thickness you’re using.
For this project, I recommend 80 lb/216 gsm cardstock.
STEP 30
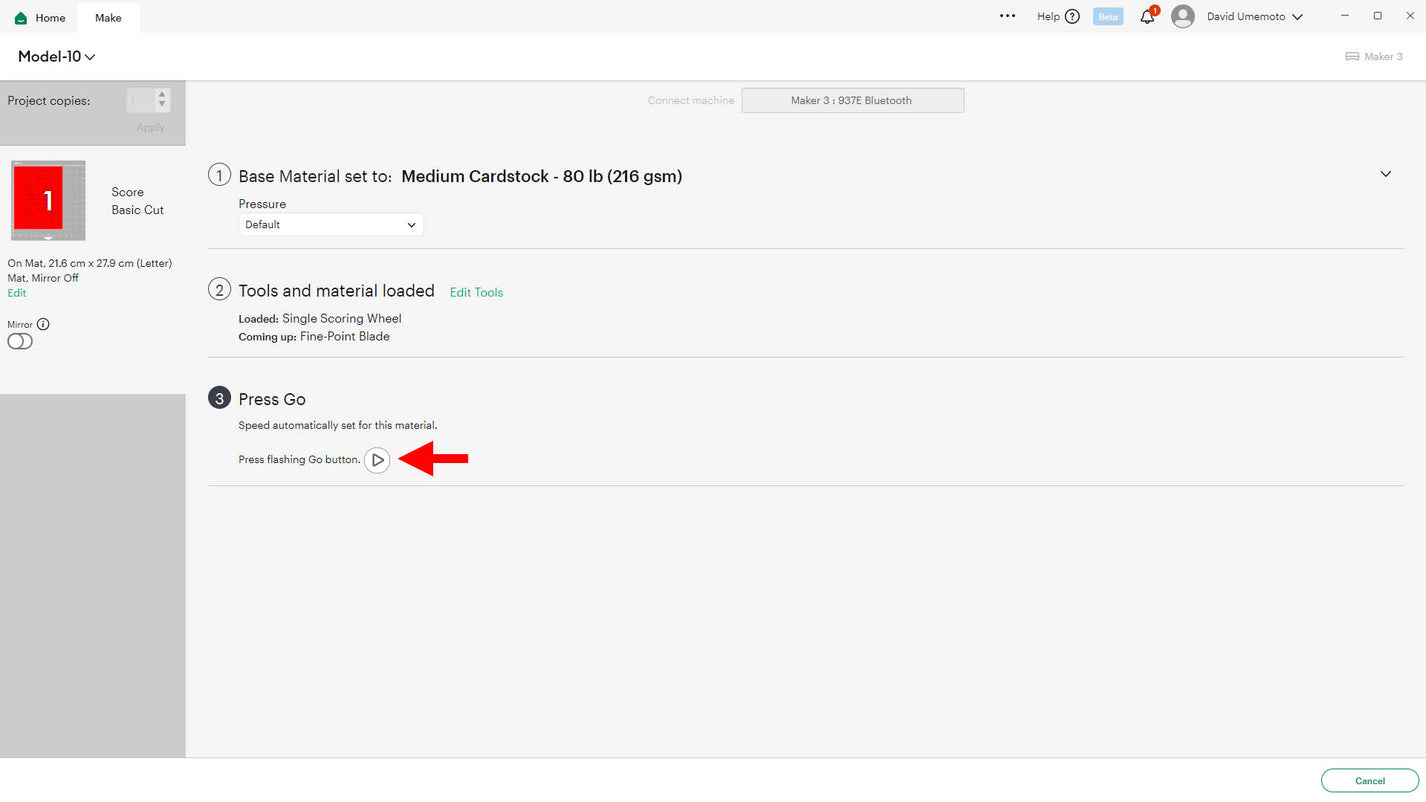
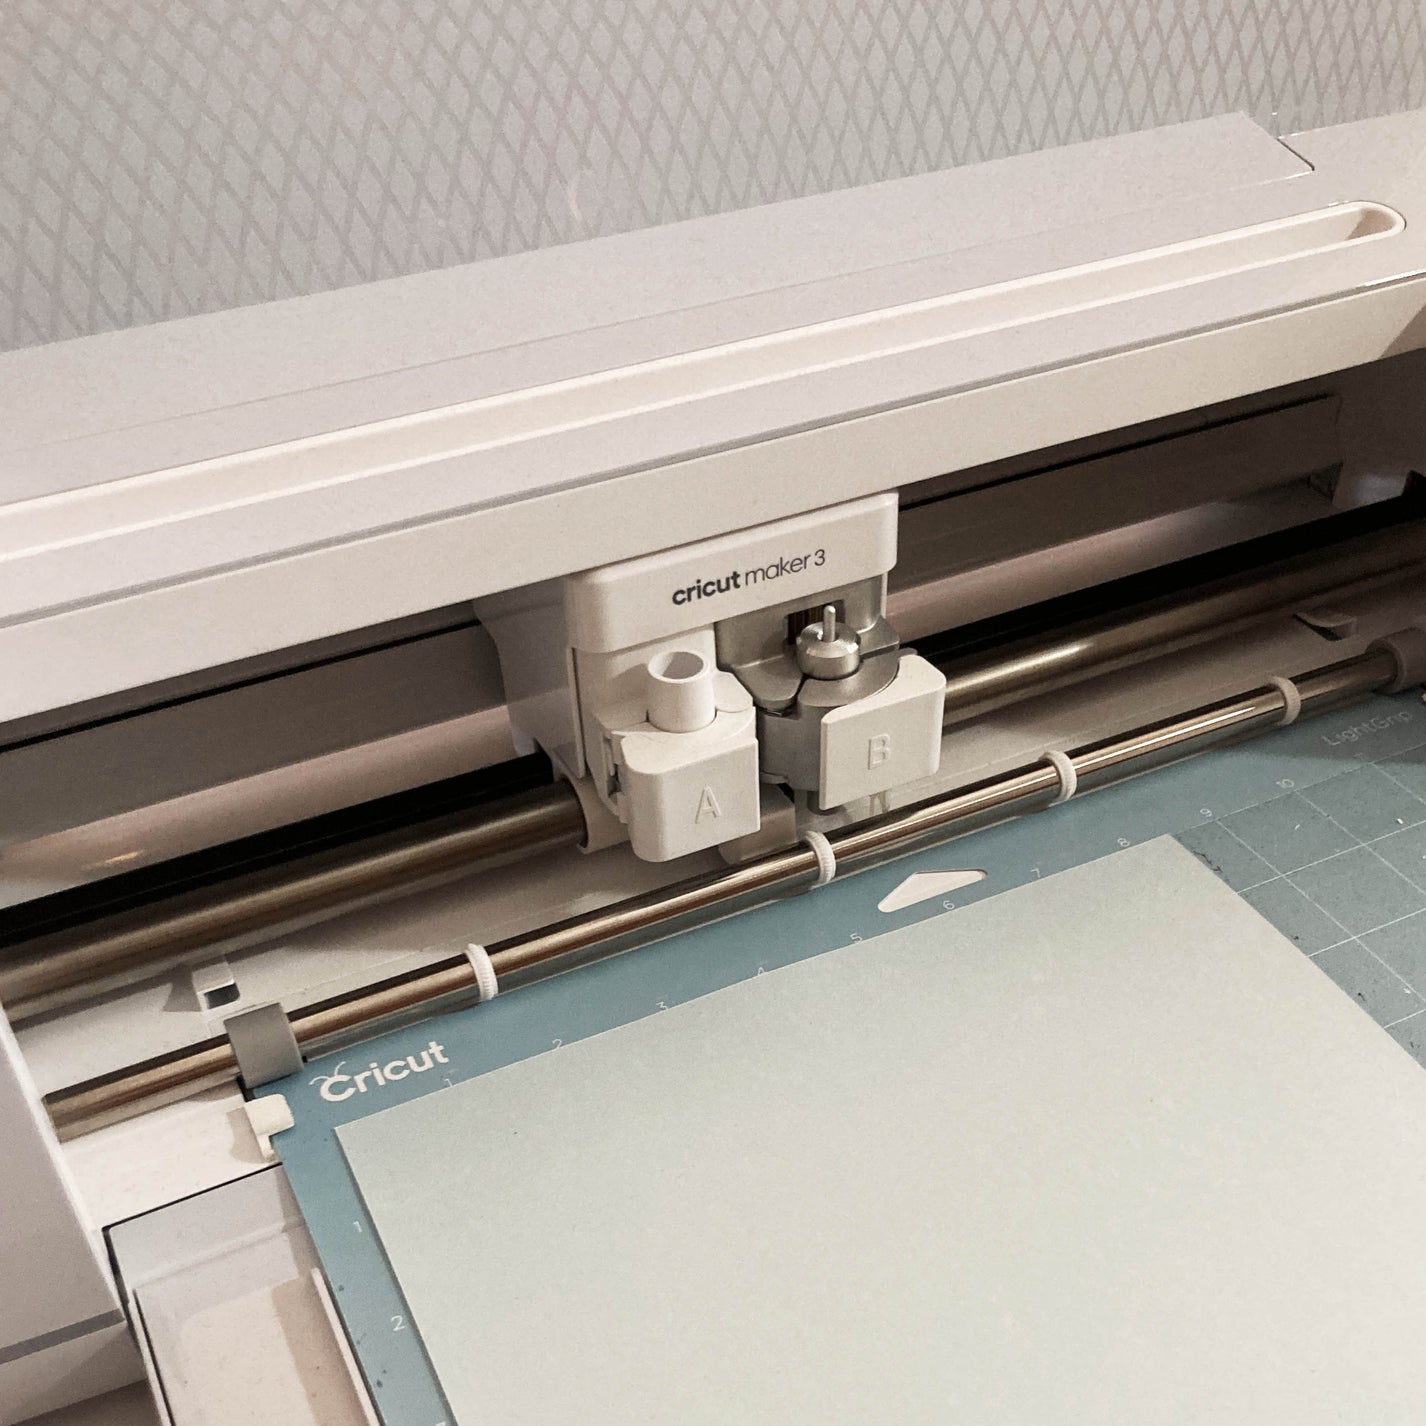
If using a scoring tool, ensure it’s loaded in Clamp B.
Load your cutting mat into the machine.
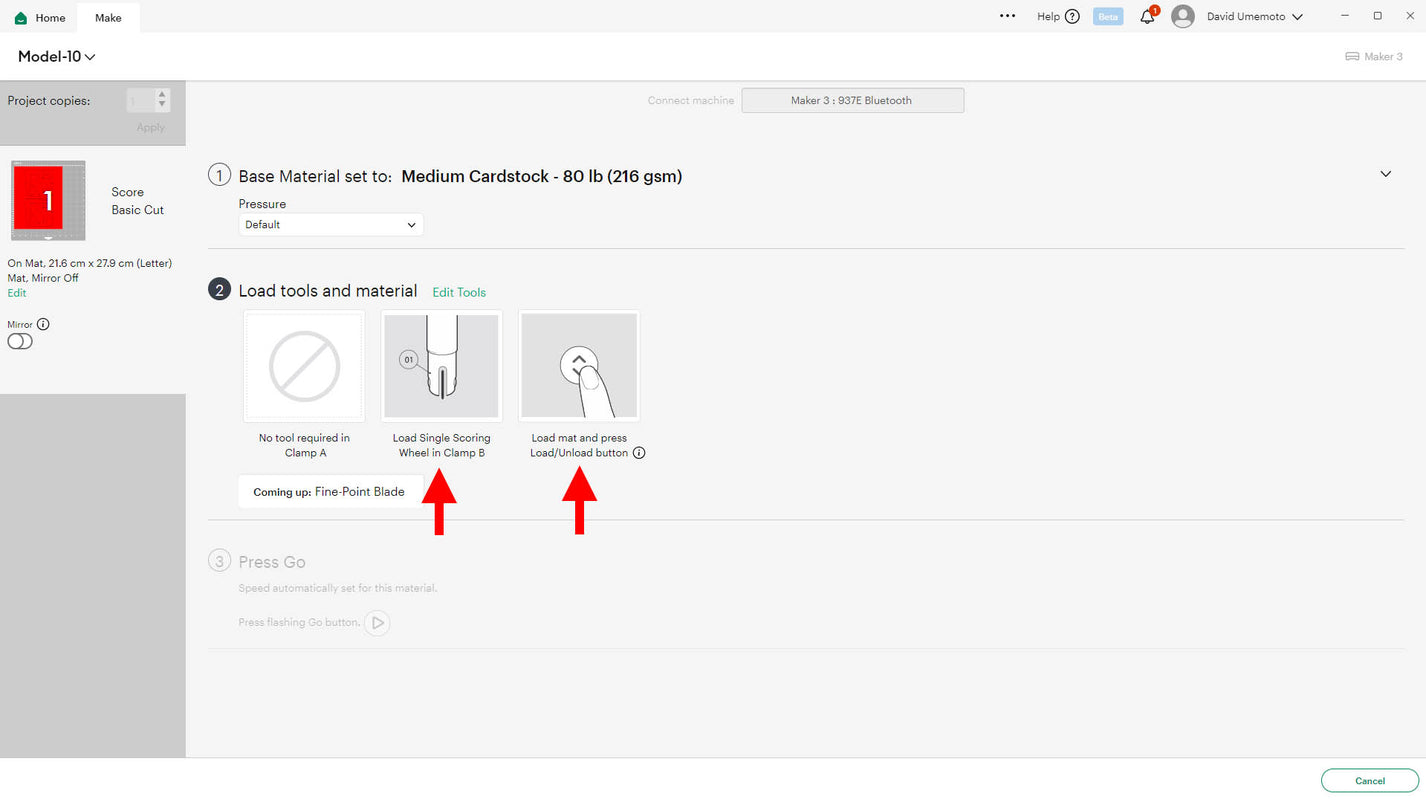
STEP 31
You’re ready to go! Press the Play button on your Cricut machine.
Congratulations! You’ve completed your first project.